
You can now prank your friend by changing the name of processor by just a few clicks. It would simply change the name not its main performance.
There are many methods to execute this simple trick. In this method I am going to show you how to change the name of the processor temporarily.I would soon be posting about how to do it permanently.
Note : This is just for educational purpose. I am only interested to show you the power of the registry editor.
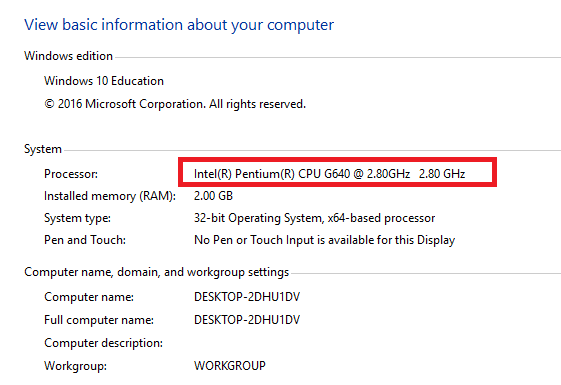
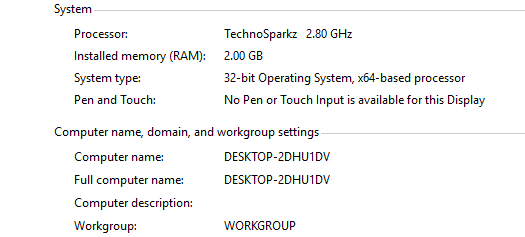
Step 1: Check the properties of your computer.
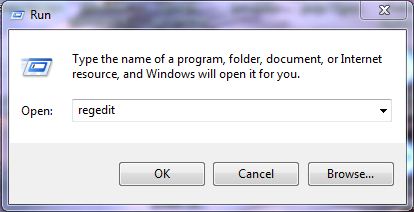
step 2: Take Run (Win key + R) => then type ‘regedit’ =>click on OK button. [regedit means ‘registry editing’]
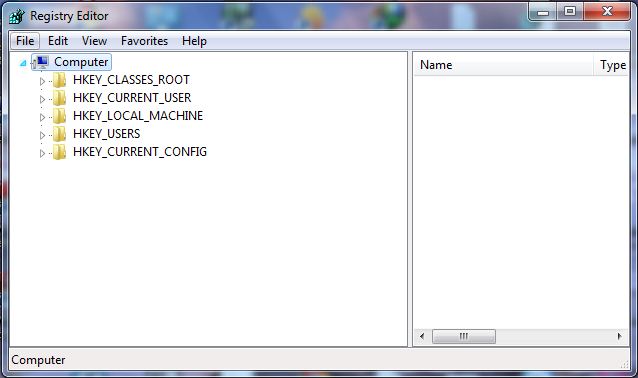
step 3: Now you will get your registry editor. [Be care in registry editing, before editing, it is good to backup your registry. To backup your registry, click on ‘File’ menu, from given list, click on ‘Export’. Then save in your hard disc location as you wish].
step 4: Head on to : HKEY_LOCAL_MACHINE\HARDWARE\DESCRIPTION\System\CentralProcessor\0
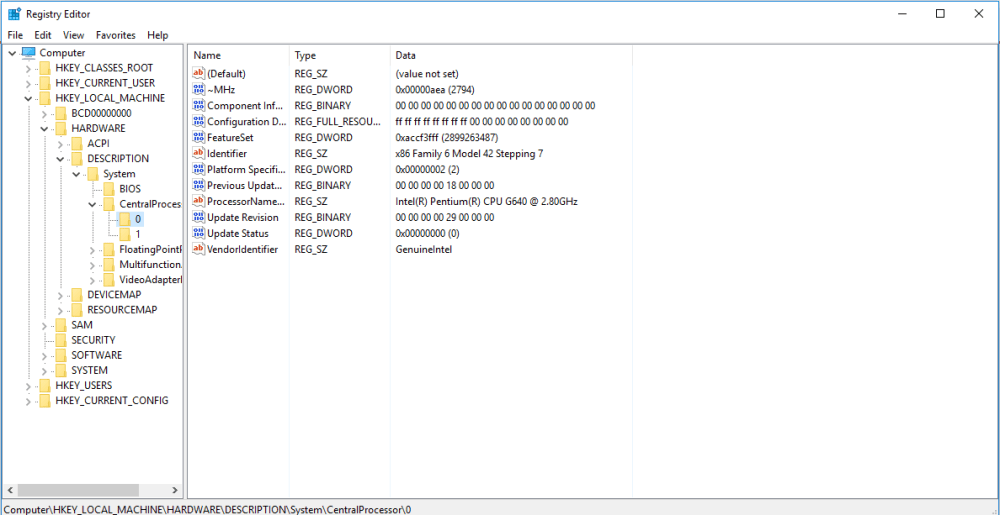
Step 5: Open up the “ProcessorName”, and change the name as you wish.

Step 6 : Click on ‘OK’ button, and exit the window, and “Voila!” you have changed the name of your processor.
This is how, we change the name of the processor. This name would be a temporary change, and I would soon be posting tutorials on how to change it permanently. Till that stay tuned.
